So, you want to quad-boot your Mac? What could possibly go wrong?
This post explores that question.
Motivation
After upgrading to the latest Unibody, I decided to turn my old MacBook Pro into the ultimate testing environment. My goal was to be able to test and develop software for Tiger, Leopard, Snow Leopard, Windows XP, and possibly other operating systems in the future (Windows 7, Ubuntu, etc., although that might require Grub).
Setting Up The Partitions
I originally thought this entire process would be a simple matter of creating partitions and installing each OS on its respective partition (Hah!). The plan was to use iPartition to create this setup without erasing my Snow Leopard install:
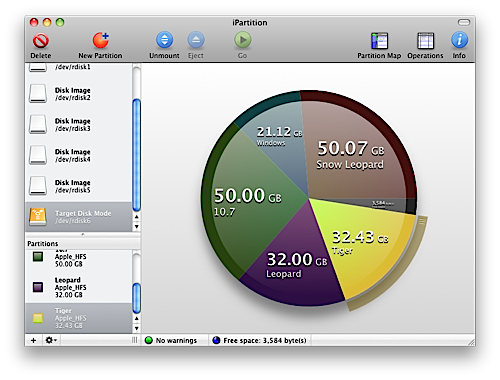
To do this, I had to first run iDefrag (also made by Coriolis Systems) to compact the Snow Leopard install. Then I could non-destructively resize its partition and add the rest.
iPartition wasn’t able to create an NTFS partition so I left the Windows partition unformatted, everything else was formatted as HFS+, journaled.
I had saved a Windows install using Winclone, so I went to try to restore that. That failed because Winclone needs the partition to be formatted first.
I tried using Boot Camp Assistant (BCA) to create the NTFS partition, but BCA greeted me with this error (for the Googlers): “The startup disk cannot be partitioned or restored to a single partition.”
To get around this error you probably could use iPartition to create a single HFS+ partition and install Snow Leopard on it. You would need to use iPartition because iPartition lets you create partitions while leaving free space on the drive, and remember, we need that space to create additional partitions for the other operating systems. Disk Utility cannot leave “unpartitioned space” on the drive, and therefore you’d end up creating more than one partition before running BCA, which would then refuse to do its thing.
I went a different route though, as I discovered that by installing NTFS-3G (the free Open Source version), I could create NTFS partitions using Disk Utility. So I partitioned the entire drive, this time using Disk Utility, and was able to successfully restore Windows to the NTFS partition using Winclone.
That was the easy part though.
Fragile Windows
Restoring Windows is one thing, getting it to boot is another. Upon rebooting to check the XP install, I was greeted with a black screen and error message along the lines of “No bootable device available.”
After searching Google I came across this hint on how to triple-boot your system. The comments section were particularly helpful, and led me to investigate the boot.ini file as a possible source of the problem.
The boot.ini file, for some reason, specifies what partition number it’s located on. My Windows partition was in the wrong location, and it didn’t like that. So I followed their suggestions and edited the file using emacs, and played around with the number. I tried every single number between 1 and 6, and even zero (out of desperation), none would satisfy Windows.
At some later point, after much formatting and reinstalling, I actually got Windows to boot, only to be greeted by a blue screen instead of a black screen, which flashed too quickly for me to read and then the computer restarted itself.
Although I don’t have a complete list of my Googles during this time, here’s what I was able to dig up from Firefox’s history, hopefully it will save a fellow Googler or two:
- chkdsk “volume appears to contain”
- “windows could not start” hal.dll
- windows xp recovery console
- “no bootable device” boot.ini bootcamp
- boot camp UNMOUNTABLE_BOOT_VOLUME
- “there is no operating system installed in this virtual machine” (That’s from Parallels)
The “Right” Partition
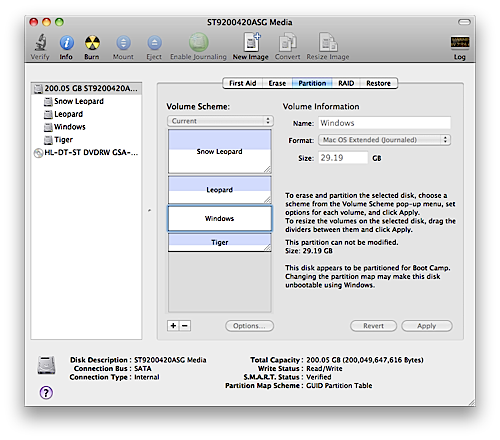
Here’s what I now know. Editing boot.ini may or may not work. In my case (with Windows XP) it definitely did not. Prior to embarking on this journey, you need to decide ahead of time what to install on the first two partitions, because the third has to be Windows. In Disk Utility, partitions start from the top:
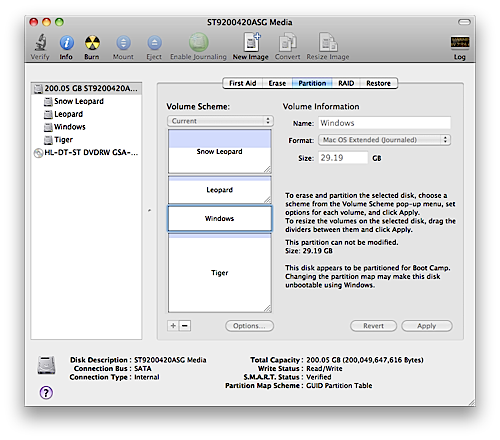
I’m pretty sure Windows must be installed on the third partition. It’s either that or the second one. For me right now, the third partition has done the trick.
Now, with a working WIndows install, I know how to verify the number in the boot.ini file. It does in fact correspond to the partition number as specified in the output of diskutil list, and/or df. It’s one greater than the number you’d expect if you were just going by Disk Utility’s GUI. Here’s the output from the quad-booting laptop as it is now, showing it as partition #4:
Last login: Sun Jun 13 19:22:13 on console
Macintosh:~ gslepak$ diskutil list
/dev/disk0
   #:                       TYPE NAME                    SIZE       IDENTIFIER
   0:      GUID_partition_scheme                        *200.0 GB   disk0
   1:                        EFI                         209.7 MB   disk0s1
   2:                  Apple_HFS Snow Leopard            49.7 GB    disk0s2
   3:                  Apple_HFS Leopard                 32.6 GB    disk0s3
   4:       Microsoft Basic Data Windows                 29.2 GB    disk0s4
   5:                  Apple_HFS Tiger                   20.6 GB    disk0s5
Macintosh:~ gslepak$ df
Filesystem    512-blocks     Used Available Capacity  Mounted on
/dev/disk0s2    97069312 23384096  73173216    25%    /
devfs                218      218         0   100%    /dev
map -hosts             0        0         0   100%    /net
map auto_home          0        0         0   100%    /home
/dev/disk0s3    63741456 24106640  39634816    38%    /Volumes/Leopard
/dev/disk0s4    57012216 29356408  27655808    52%    /Volumes/Windows
/dev/disk0s5    40174016 15283088  24890928    39%    /Volumes/Tiger
Stubborn Tiger
Not to be outdone by its Redmond counterpart, Mac OS 10.4 Tiger turned out to be even more difficult to install.
First, the install disk that came with the computer (which had 10.4.9) refused to be recognized. It spun for a little while and was then spit out. So I inserted it into my PowerMac figuring I could just install over Target Disk Mode, but it refused to run because Apple watermarks these DVDs so that they only work on the exact same kind of computer.
Fortunately, I had another Tiger install disk that did work with any Mac. It was only after the installation finished (over Target Disk Mode, again), that I realized it was a PPC-only install, causing the Intel laptop to kernel panic on boot.
Feeling defeated, I went for a jog, during which I realized that I could insert the Intel install disk into my Unibody MacBook Pro, copy it onto an external hard disk, and boot off of that, thereby bypassing the flaky SuperDrive on the old MacBook Pro.
That outta do it, right?
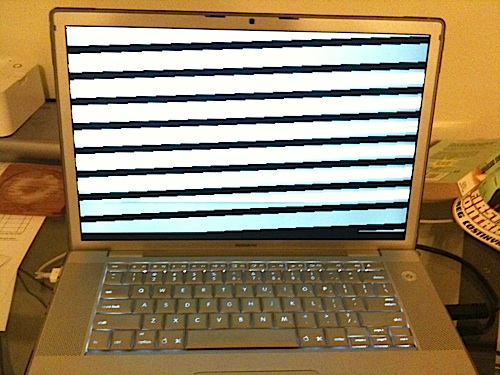
And it did! Now I just had to figure out what to do about the crazy blue and black stripes on the screen that made it impossible to see the installer.
You see, this laptop, like most of its kind, was affected by the infamous NVIDIA 8600GT bug that completely wiped out its display capabilities. Apple kindly replaced the logic board but, in doing so, apparently killed its compatibility with Tiger.
You would think that by this point any sane person would have called it a day, but it was far too late for me. My OCD was in overdrive, and I had become sort of obsessed with solving this problem. Failure was not an option… not yet at least.
Verbose mode showed the following error:
GFX0 matching specific fails
Google wasn’t very helpful here unfortunately, but I figured that there was a missing or outdated graphics driver. So I spent some time copying and replacing kernel extensions from my Leopard install (which had finished without problems) into the Tiger installation drive. This took a rather long time, as each time I changed a kernel extension I had to reboot to see if the fix took. I had to replace them one at a time so as to avoid potentially compounding the problem (as kernel extensions have dependencies).
Sidenote: If you ever find yourself switching out kernel extensions, don’t forget to delete the cache files ‘Extensions.mkext’ and ‘Extensions.kextcache’ each time you do. These files may or may not be present in the /System/Library folder, depending on the OS version.
Eventually I realized this was stupid, because I could simply run the OS install by running the OSInstall.mpkg from within Snow Leopard:
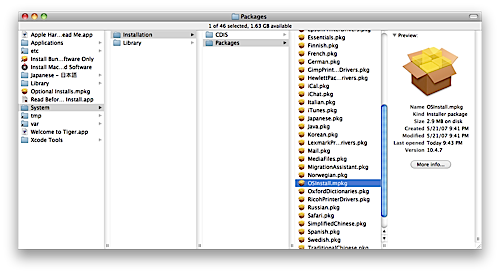
The installer ran (and hung at the end, of course) but it looked like it had installed everything that was necessary so I rebooted again from the Tiger disk.
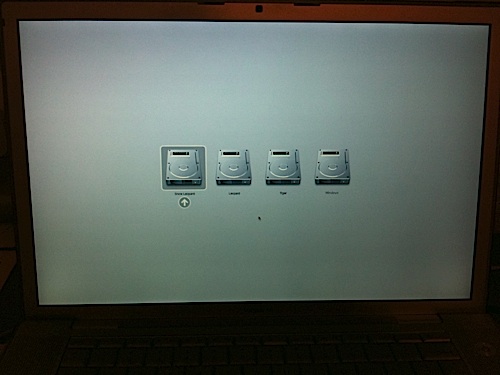
I should mention that sometimes the disks that I needed to boot from did not appear in the Startup Disk preference pane, despite being bootable. I got around that by running the bless command on the volume:
sudo bless --mount /Volumes/Tiger --setBoot --nextonly
I booted into Tiger and again was greeted with its unreadable blue stripes, and by now the all too familiar setup theme music. Curses!
I decided to install the 10.4.11 Combo Update from Snow Leopard, thinking it might contain the proper drivers. The download link on Apple’s site was broken, but by this point the random problems no longer surprised me. After some searching I finally found a working link to it. Too bad though, the update did not fix the problem.
It then dawned upon me that this was all a test. God was testing me, to see how badly I wanted to install the outdated operating system, and whether I really did possess the geek-credentials I claimed to have.
So I went back to the old plan of replacing kernel extensions.
I copied a bunch of extensions over from Leopard that I thought might fix the problem without causing too many dependency issues. While that did get rid of the error message, and Tiger no longer sported blue and black stripes, instead, I saw only the black and white text of the verbose screen while the Tiger setup music played in the background, taunting me.
I proceeded to replace the kernel extensions with the originals, one-by-one, hoping to find the one that was responsible for the missing error message. After what had to be at least an hour I finally noticed it: the GFX0 error message was back, and it was after I had replaced NVDAResman.kext with its original.
Intrigued, I restored the entire Extensions folder back to its original state and replaced just NVDAResman.kext.
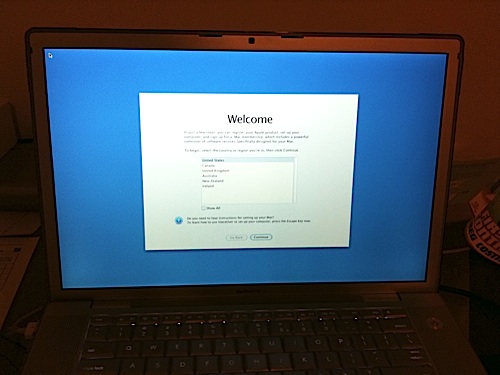
Success!!
Almost! There was one loose-end left to fix. After logging into my account on Tiger, I got a couple of error messages complaining about NVDANV50Hal.kext and GeForce.kext not loading properly. Simply removing them from the /System/Library/Extensions did the trick, with no noticeable ill effects (I tried replacing them with the ones from the Leopard install, but that didn’t work).
As a finishing touch, I used iPartition to shrink the Tiger partition. This way I won’t have to run iDefrag on it if I decide to install additional operating systems in the future (like 10.7). Here’s how it looks in Disk Utility:
Hopefully this post will save someone a headache, or two. 🙂
Great read, and book marked. I don’t need all this info right now, but it will be useful later. Thanks
I would swear I was the only person who had days like this.
I’ll admit you appear to solve the issues faster.
Maybe we should name this type of writing “slapstick geek”.
Wow, you did an amazing job.
I tried to install mac os tiger on my macbook pro 3,1. I also have the replaced logic board, after I followed your steps I had it running, but the airport does not work, and the graphics don’t work either, there is no CI or QE and I can’t change the brightness. Your install seems to be fine, so what was your solution? my tiger install is completely useless right now, there’s not internent or support for running any apps because of the graphics issue.